Showing posts with label Sourdough. Show all posts

Sunday, 20 August 2017

Sourdough in a Day at Brickhouse Bread

Back in May I went on the 'Sourdough in a Day' baking class at the Brickhouse Bakery in East Dulwich. It was a course that I enjoyed a lot more than expected and in a year that has been so busy, it was great to take some time out for myself and do something that I enjoy. Even though I spent the whole day on my feet I came away feeling recharged which was nice!

Everyone on the course had been enrolled as a birthday present and for most people it was their first sourdough experience. I haven't baked in a while but did go through a pretty serious sourdough phase back in Australia so was the most experienced person on the course.
The course was run by bakery owner Fergus and we discovered pretty early in the day that we both had a connection with Sydney and we had visited some of the same bakeries there. For someone that is periodically tempted by a career change it was also pretty inspiring to hear that Fergus quit his corporate job a few years to learn to bake and then set up his own bakery in a garage. Do they do apprenticeships???
Despite it being a bit of a beginners course I definitely learnt a lot during the day (plus it was good fun to play with some dough after a while out of the kitchen). The method we were taught isn't one that I've tried before and I liked the simplicity of it. There are quite a few stages, but none take more than a couple of minutes and it felt like a method that you could fit into a routine at home.

I liked that I got to bake a loaf in a deck oven for the first time too as well as having the chance to discuss how to get the best results from a home oven. Although the loaf that I baked in the below photo (mine is back left) came out a little under-baked, showing that the professionals can mistakes too.
We cooked three different loaves, plus a pizza for lunch, over the course of the day. My only criticism of the day was that it felt a bit flat during the 40 minutes while our loaves were in the oven. Fergus was happy to answer any questions that we had, but I think most people were quite tired from a day on their feet and tea or coffee and the chance to sit down would have good. However, overall it was a great day!
My haul of goodies for the day.

Sunday, 12 October 2014

Coopers Bakehouse Open Day

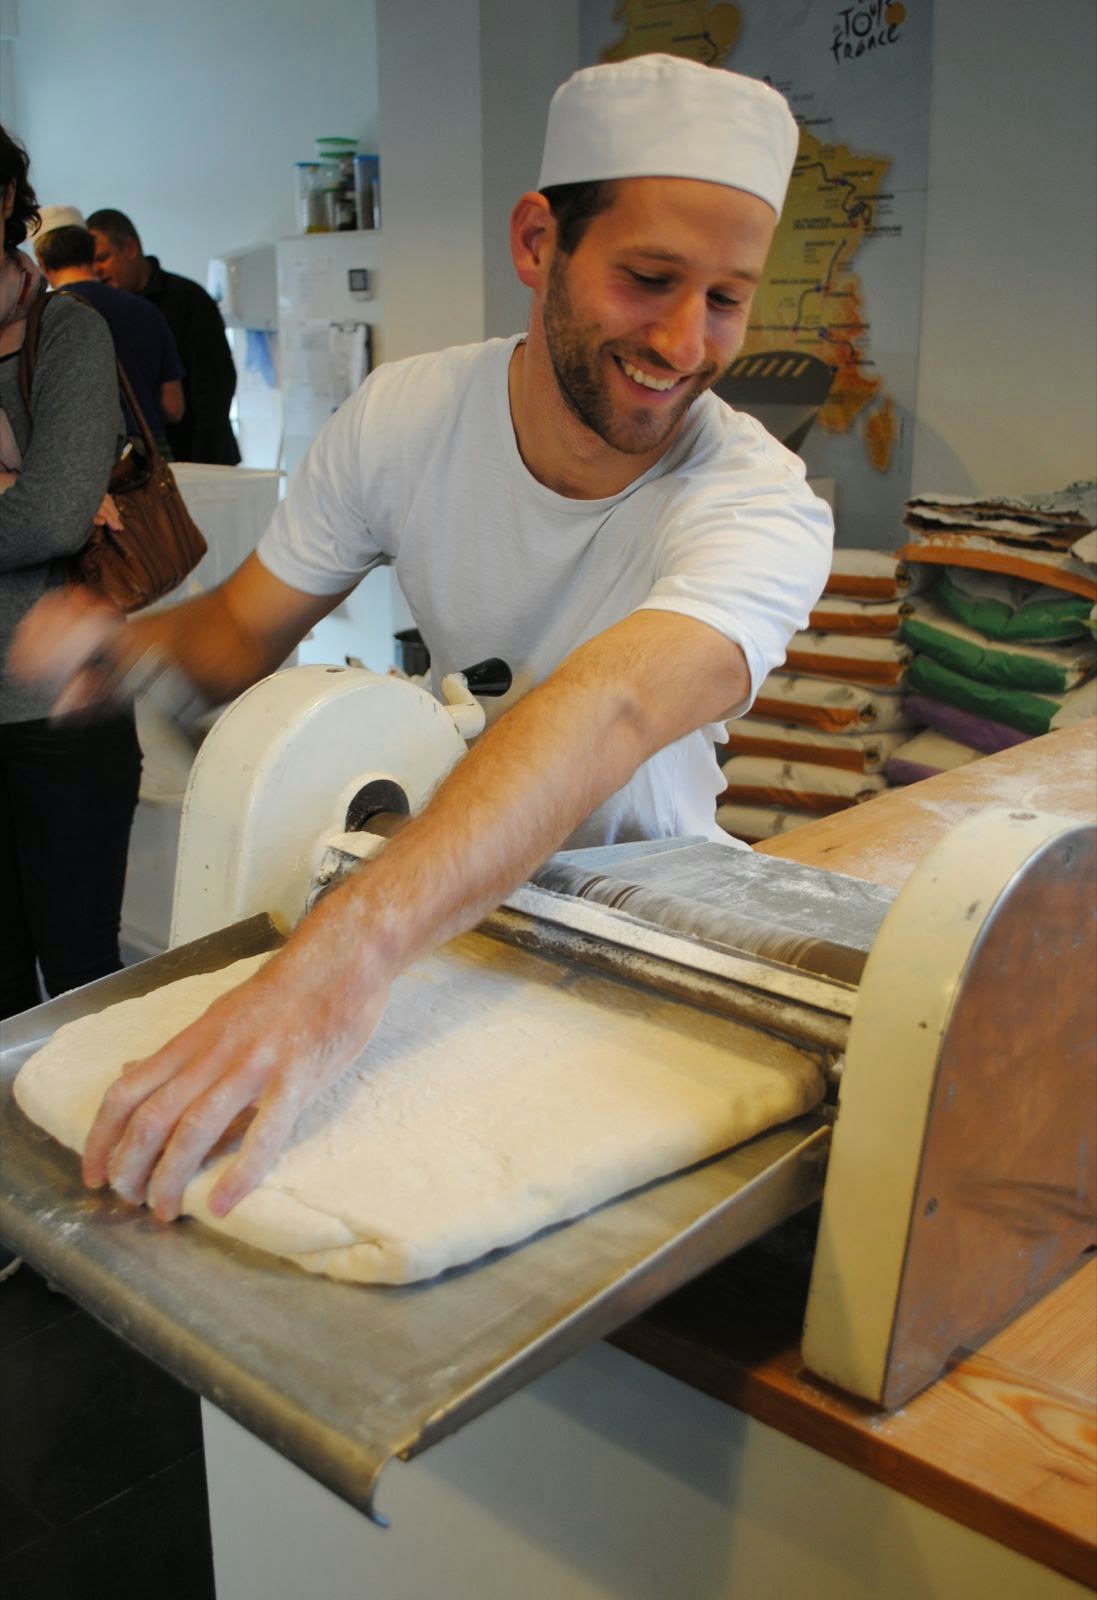
Rolling the croissant dough
Yesterday we popped along to the Coopers Bakehouse Open Day in their (relatively) new headquarters in Dragonfly Place.

For a bread nerd it was lovely to step inside a professional bakery and to have a look around. We got to spend a bit of time talking with Francis Cooper, the owner, who showed us the ovens he uses and we had a bit of a chat about my current troubles with the oven in the rental flat that we've just moved into. I get the feeling I've never cranked my oven up to pre-heat long enough before baking.

Coopers is on a much smaller scale operation to Sydney's Brasserie Bread that I visited three years ago. It was wonderful to see some ingeniously low tech solutions like the home made, high humidity, proving cupboard and to talk about how to get the best oven spring.

Around the tasting table we got to try both their white and wholemeal sourdough loaves, as well as one of the Danish pastries. I preferred the white loaf over the wholemeal, as I found the wholemeal a bit too sour for my tastes.

Speaking to a one of the staff over the tasting table, they start at 4am most days in order to get the deliveries ready for 9am. You clearly need to be a lover of early starts to be a baker, no wonder they said they'd never seen an episode of Bake Off.

I'd love it if they did some advanced bread or patisserie courses.

Croissants and Danish pastries shaped and ready to prove

Work bench

The founder of Coopers Bake weighing out some dough

Flour

Friday, 2 August 2013

Project Sourdough: A pheonix from the flames


I decided to bake some more bread on the weekend as my stocks in the freezer were running low. My preferred method for baking sourdough these days is the sponge method, where you dispense with the overnight ferment in the fridge. It just seems to suit my routine better.

However, with a lazy weekend ahead of me and having recently read Brydie's post on her everyday sourdough, I decided to return to the overnight ferment.

I was a bit sloppy in measuring when I feed my start during the week and my hand slipped when adding water to my dough, meaning that a 66% hydration loaf, was probably above 70%.

I had a very wet dough on my hands and I could barely shape it. I ended up making a rough boule and battard, flinging the dough into my bannetons and then popping them into the fridge for 18hrs.


When I got my dough out of the fridge the next morning my dough had more than doubled in size and was very over proved. I'm definitely not an expert baker, but I thought in the fridge the yeast was supposed to sleep and only the sour taste was supposed to develop. Either my fridge is too warm or my starter is some kind of super active monster.

The wet dough had stuck hideously to my bannetons, but I managed to coax it out and onto some greaseproof paper. Without the support of the banneton the over proved dough flattened to the thickness of a couple of pound coins.

It was going to be a disaster I thought, but I had no option but to chuck them into the oven. I gave them a good long 50 minute bake, ten minutes longer than I usually would for a loaf of this size.


What came out was nothing short of miraculous. A fabulously crunchy crumb that goes all over your bread board when you cut it. The texture of the bread is wonderfully holey and best of all it tastes French. Like the wonderful bread you get from the village boulangerie when you are on holiday. I've never had that before and it's magical.

I've no idea if the 'French' taste comes from using a small amount of wholemeal in the mix, from the cheap Sainsbury's flour I'm using for the first time or the overnight in the fridge, but I want more of it.

The only problem is, I know I won't be able to recreate these loaves no matter how hard I try.

Ingredients:
550g white flour
200g wholemeal flour
510g water
400g starter
15g salt

Once mixed divide into two loaves and bake for 50mins. Full the full method see Brydie's blog.

Sunday, 3 March 2013

Project Sourdough: wholemeal seeded loaf


The next bake after you've just made a great loaf is always a difficult one. Will it be as good? Am I destined for disappointment? With my bread supplies in the freezer running out it was time to get my starter out of the fridge and give the next loaf a go.

I decided to use some of the flour I'd found in Dulwich and bake a 55% white and 45% seeded wholemeal loaf. It would also be the first bake in my new oven.

The sponge method is now my default way to bake, with an active starter and a previous success I was feeling confident. I didn't have as much time as usual so I cut out a couple of folds and gave the loaves a sleep in the fridge overnight (common in many recipes, but not the sponge method I follow) so that I could bake the loaves the next day.


On the Sunday morning I got my loaves out of the fridge and head out for a long run while they had their final prove. Despite the bread having four hours to rise they seemed to have barely grown. Being so cold in my kitchen I don't think the core temperature had risen sufficiently for the loaves to prove properly.

As I needed to head out for the afternoon I couldn't give the dough any longer so had to whack them in the oven. I watched eagerly through the glass as the bread met my new oven for the first time. The bread didn't seem to rise much in the first 10-15mins and I was fearing I'd have very dense cakes on my hands. However, they continued to rise during the bake. It was almost like delayed oven spring. Most odd.

I was really pleased with the final taste of the bread. The wholemeal flour and seeds have given the crust a great taste. I also think the overnight the loaves spent in the fridge helped the sour to develop.

Two good loaves in a row. Can I make it a third?

Monday, 4 February 2013

Baking sourdough in the oven that wasn't


I decided that I'd treat myself to an oven as a little January present to myself. With a million different ovens on the market research is more complicated than you'd think. There are just so many opinions and options out there. I decided to go with the Which? best buy oven as it was a sensible price and I knew I wouldn't be going too far wrong.

On Tuesday night I got home later after dinner with a friend and a glass of red wine to the good, logged onto the John Lewis website, clicked purchase and selected Saturday as a delivery option. Job done I headed to bed.

I decided that I wanted to bake a loaf as sourdough to christen the new oven. On Friday night I mixed my sponge following the River Cottage method.

The new oven doesn't come with a plug or electrical cable (no idea why) so on Saturday morning I pulled out the old oven and took off the back so I could remove the cabling and swap it onto the new oven when it arrived. And then I waited...


.....and waited. After lots of muttering about John Lewis' delivery service I decided to give them a call. Checking the order confirmation I realised I'd selected next Saturday. Never drink wine and order an oven on the same nigt. What an idiot......

The old oven was re-wired and connected back up. And then I baked!

I've only been baking semi-sourdough since getting back to the UK and this was my first loaf of full sourdough and it turned out really well. There was lots of oven spring and the bread has a great texture. I'd prefer a slightly thicker crust, but hopefully the new oven will help with that.

Sunday, 20 January 2013

Project (semi) Sourdough: First loaf of 2013


I decided that I wanted to bake my first loaf of 2013 this weekend. With the cold snap that is currently going on in the UK I wasn't sure how a pure sourdough loaf would stand up and I didn't want to be tied to the kitchen if proving times were taking longer than expected, so decided on a semi-sourdough loaf instead.

I also had in the mind to try and re-create the excellent pain de campagne that I bought from Dégustation in Brockley a few weeks ago. Searching for "semi-sourdough pain de campagne" didn't yield many results, but I did find this recipe on the Wild Yeast site. It looked like just what I wanted so I decided to give it a go.


The results turned out pretty well. I tasted the bread alongside a slice of the pain de campagne I had in the freezer. My loaf isn't as good, but not far off which is pleasing.

My bread had some reasonable oven spring and a nice structure to the bread. I would have preferred a thicker crust (I think I could bake it for a bit longer next time) and there is still a faint taste of the dried yeast in the bread. Must try a full sourdough next time.

Over the past week I've been thinking of buying a new oven and baking this loaf has firmed my resolve to get one. The oven took an hour to get up to temperature, I really don't trust the temperature and had to bake the loaf for twenty minutes longer than prescribed and when I through some water on the base of the oven it dripped back out rather than turning to steam. Clearly something not right with the temperature.

The only question is could I install a new oven without electrocuting myself or blowing up the oven?

Sunday, 14 October 2012

Project Sourdough: UK edition


Having been back in the UK for four months I was getting the urge to bake again.

I had a few problems getting a starter going in Sydney and was hoping to avoid the same angst second time around. As most bakers are regularly binning some of their starter as it grows and divides I made an appeal on the local forum for anyone who had some to give away. Sadly no one came forward so I set about creating my own.

I bought some rye flour (which is supposed to be easier) and loosely followed Byrdie's ridiculously easy post on how to create a starter. After three days it had taken off! (Top photo)

With my starter less than a week old I was invited to Sunday lunch at a friend's house and decided to take a long a loaf of bread.

I followed my favourite sponge method. A starter is generally a bit weak to bake with after just four days and my sponge wasn't looking as vibrant as it usually does so I decided to add some dried yeast, making what the Bourke St Bakery calls a semi-sourdough.

My oven here in London isn't the best. It has a very top down heat which has a tendency to burn things so I decided to go for the Le Crueset method of baking.

My first loaf in the UK was pretty good. The oven spring was great (which I think baking inside the pan helps with), it had a great shape and importantly my friends all seemed to love the bread.

The sour flavour wasn't as developed as I would have liked, but that's to be expected while my starter is still young. Baking the bread inside the Le Crueset meant that the crust brown as much as I would have liked. I find that the majority of flavour in a sourdough is in the crust so I don't think the Le Crueset  will be my favoured method once I have a better oven.


For my second loaf this weekend I was rushed for time and had half a packet of dried yeast left to use so decided to go for another semi-sourdough. The Bourke St Bakery book suggests not slashing the top of a semi-sourdough loaf prior to baking. As you can see the crust half erupted so I'll be ignoring that advice next time round!

It's good to be baking again.

Saturday, 28 April 2012

Cooking: White, Semolina, Rye and Sesame Sourdough


When I first started project sourdough I bought a big bag of semolina flour. I didn't really know why, but it seemed a good baker type thing to do!

I'm still not exactly what the best uses for semolina are. I've predominately used it for dusting my bannettons and homemade cardboard peel. However, I've always been tempted with the idea of actually baking a semolina loaf.

Last weekend I set out to make a white loaf and then saw a tweet from Diana about her 4S (Spelt-Semolina-Sesame-Sourdough) bread and an idea was formed.

Adapting the River Cottage Sponge method and this recipe I created a hybrid white, semolina, rye and sesame loaf.


The final loaf has a distinctly nutty sesame flavour. It takes you a little by surprise as you can't see the sesame seeds in the loaf unless you look closely. The rye flour adds an earthy flavour. There's lots of action going on in the crust. I think it would work really well as a toasted bread.

Although the main objective of the loaf was to bake with semolina flour for the first time it is completely unnoticeable in the final loaf (to me at least). The loaf didn't have a particularly open structure, but I'm not sure if the semolina made a difference to this or it was a factor of the rye flour and me horrendously over proving the bread.

Ingredients:
325ml of water
250g of white flour
Ladelful of starter
100g rye flour
200g semolina flour
12.5g salt
60g of sesame seeds

Method:
Create a sponge by mixing the water, white flour and starter and leave overnight.

Toast the sesame seeds and set to one side.

Add the rye, semolina four and salt to the sponge and knead for 10mins (I used a mixer). Add the sesame seeds in the final couple of minutes and knead through the dough.

Form into a round and place in a bowl to prove for an hour.

After an hour knock back, fold, form into a round again and then place back in the bowl. I repeated this step two / three times.

Shape the loaf and leave for a final prove. I gave my bread 5hrs (as I went out) which was a bit too long!

Heat the oven to 250 degrees. Bake with steam. After 10mins turn down the oven to 200 degrees and bake for a further 30mins. The loaf should bake for 40mins in total.


Monday, 23 April 2012

Cooking: Sourdough Pizzas Part 2

A gorgeous pizza

Having made our pizza dough, it was cooking time!

The ideal is to have a wood fired oven in your back garden, but not many of us are that lucky, so improvisation is key. Clint made it look easy, but there was lots of balancing and tweaking being done. I know that I will struggle the first few times on my own before I get the hang of it.


The first step was to shape the dough. Not a rolling pin in sight Clint was shaping the dough by hand. He made it looks deceptively easy, but my effort was an unattractive oval!


Unconventionally the pizza is placed onto the stone with out any toppings to get a head start in the cooking process. Again, Clint made the flick off the paddle onto the stone look deceptively easy, but on my only attempt I partially missed the stone and some of my dough ended up on the bars!


After the base has had a couple of minutes to start crisping up the tomato sauce and toppings are added. When you are done close the lid on the BBQ to get the heat circulating. We found that all of the toppings cooked pretty quickly.

Once it's done, whip it off the BBQ, cut and enjoy!


Method:
1. Heat your BBQ on maximum to get everything nice and hot.

2. Take a ball of dough, flour it liberally on both sides to stop it sticking to your hands and flatten it out slightly.

3. Liberally sprinkle your pizza paddle with semolina to stop the pizza sticking when you place it on the paddle.

4. Starting turning the dough on your finger tips with the dough facing up, parallel to the floor. As it stretches it will begin to fall down one side of your hands. Keep the dough moving constantly until you are happy with the size and then lay it on the paddle.

5. Slide the dough onto the pizza stone. Close the lid and let it cook for 1 - 2mins to give the base a head start in cooking.

6. Add the tomato sauce (pasatta, garlic, chilli and dried Italian herbs) and the desired toppings.

7. Close the lid of the BBQ and cooking until your toppings and the base is done.

You want to keep the temperature on the BBQ pretty high throughout, but it will need constant tweaking so the topping / base don't cook too quickly in relation to each other.

Things to try:
The best pizzas I've eaten have had a crunchy top to the crust round the edge of the pizza. Sadly ours didn't. I'm tempted to try putting the plain base onto the stone for a minute, flipping it, leaving for 1 - 2mins and then proceeding as above.

I've no idea if it will work, but could be fun to try!

Toppings:
We tried four toppings on the night:
1. Tomato sauce, chrizo (which had been chopped and fried previsously), lots of basil leaves and grated mozzarella.

2. Tomato sauce, grilled eggplant and grated mozzarella.

3. Tomato sauce, capers, anchovies, chilli and ricotta.

4. Tomato sauce, mushroom and grated mozzarella.

Saturday, 21 April 2012

Cooking: Sourdough Pizzas Part 1


Last July I gave my good friend Clint some of my sourdough starter. Easter was the first time I've seen Clint since then and it was great to spend some quality geeky sourdough time to together. 

We've picked up different tips and tricks in our baking journey. Clint has done a lot more playing with different types of flour than I have. While I was able to show Clint some of my kneading techniques. We're both hacks, but it was fun to mess around together with some flour.


My last trip to Brisbane saw the epic burger project which created a truly magnificent burger.

This time it was all about the pizza and I was happy to sit back and soak up Clint's knowledge from all the experimentation he's done. My previous attempts at homemade pizza have been pretty disappointing. A lot certainly comes down to the cooking, but without that tasty dough you're not off to a good start.

Clint started his pizza journey with this epic recipe. He sent me the link previously and I found it very intimidating.  I'm pleased he was able to distill the knowledge to me much more simply.


Ingredients:
Makes three pizzas

130g starter
370g flour
220g water
15g salt

Method:
1. Mix together the starter, water, salt and 50 - 75% of the flour.

2. Rest the dough for 25mins to autolyse.

3. Knead the dough for 7 - 10mins. Spend most of the time kneading with the remaining flour held back. Slowly add the remaining flour in the last 3 - 4 mins.

4. Turn the dough out onto the bench and give it a quick knead by hand.

5. Divide the dough into three equal size pieces and then shape into rounds.

6. Flour the dough and sit the rounds on baking paper, cover and place in the fridge. We did 24hrs in the fridge, but you can leave it for up to a week (apparently).

7. Take the dough out of the fridge 2 - 3hrs before you need to bake to bring it up to temperature.

Wednesday, 22 February 2012

Project Sourdough: Feeling like a baker, Spelt loaf


Up until now I've been following recipes when I bake. I've tried out a couple of different methods and tweaked things here and there with advice from friends or from watching videos on YouTube. (I've found YouTube is an amazing instruction manual for all sorts of things.) However, it it wasn't in the Bourke St Bakery or River Cottage cookbooks, or on Brydie's blog, I wasn't going to bake it.

Last weekend I had some spelt flour that had been sitting in my cupboard too long and needed using up. No recipe seemed to fit exactly what I wanted to do, so I made one up. I still don't really understand hydration (the ratio of flour to water - I think) or lots of other bread basics, but it seemed to work pretty well.

I was pleased with the final loaf. The wholemeal spelt flour gives a distinctly nutty flavour. The loaf had a firm (but not crunchy) crust. Spelt loaves have a reputation for not rising much. While the loaf wasn't as airy as the barm bread I made, it was certainly lighter than some of my early attempts.

Spelt and wholemeal sourdough, adapted from the River Cottage.

Ingredients: 
For the sponge:
250g wholemeal spelt flour
350 ml water
3 tbsp starter

For the dough:
300g wholemeal flour
12g salt
1 tbsp olive oil
Rye flour for dusting

Method:
Combine all the ingredients for the sponge and leave overnight.

Add the remaining flour and salt and once incorporated into the sponge add the oil. Knead in the machine for ~7mins.

Fold and leave for an hour to prove.

Knock out the air, fold again and leave for another hour.

Shape, place in the bannetton and leave to prove for the final time (about 3 hrs).

Bake with steam on a stone for 30mins.


Not bad for going it alone!

Sunday, 12 February 2012

Project Sourdough: Barm Bread II

 
After my disaster cum best loaf ever, I decided to give the Barm Bread another try. This time rather than scaling the recipe to two thirds I thought I'd make a full batch to help reduce the margin for error.

Although Brydie laughed at being called my baking oracle (see comments) I was following her advice to give me a helping hand a second time round.

I was expecting a wet dough this time around so was a lot more prepared. Before I started making the bread I decided that I wouldn't fight it. I also made the decision to do most of the work in my mixer and keep handling time to a minimum.

I'm very pleased with the final structure of the loaf.

Last time the dough was a big gloppy mess and I had to add an extra 100g of flour to bring the dough under control. This time the dough was still wet, but was manageable. I had to flour the bench quite liberally and also keep my hands floured to be able to fold and shape the dough. It was a bit messy, but overall workable.

I decided to use a loaf tin for the first time. Rolling the dough into a Swiss roll type affair and dropping it into the tin seems to be the way to go after watching a few Youtube clips. The wet dough definitely needs the support of a tin or bannetton to help it rise.

While my dough was proving I went to the Orange Grove markets, dropped into see some friends who kindly invited me to stay to lunch, and then had to do some work. The end result were two very pillowy and, probably over proved, loaves. I got them into the oven as soon as I could.

I was really pleased with the final loaves. It definitely seems to have a soft and chewy texture. Even though I used quite a high oven temperature (I forgot to turn it down after 10mins) it doesn't have a particularly firm crust. The bread has a wonderful smell and a beautifully open texture.

Success!

To try next time:
- Trying to transfer the successes of the barm bread to other recipes. Higher hydration? Long proving times? Sponge method?
- Remembering to turn the oven down after 10mins

I followed the recipe from here.

Barm
330ml room temperature, bottle fermented beer.
75g flour
3 tbsp starter

Dough
550g barm (my barm only weighed 475g so topped it up with 50% water and 50% flour)
600g flour
200ml water
2 1/2 tsp salt

Method
1. Whisk together the barm ingredients and leave overnight.

2. The next morning combine the barm, flour and water. Leave for an hour.

3. Add the salt and knead for 5mins in the mixer with a dough hook.

4. Turn onto a liberally floured bench, fold the dough and leave for an hour.

5. Divide the dough in half so you have two 750g loaves. Shape and place one in a bannetton and the other in a greased and floured loaf tin.

6. Leave to prove for four hours.

7. Slash and bake with steam at 230 degrees for 10mins and reduce to 200 degrees for the final 25mins.

Friday, 27 January 2012

Sourdough: Barm Bread


From the depths of despair came one of my better loaves of sourdough.

Air bubbles, we have air bubbles!

When my baking oracle Brydie posted about a bread recipe using beer I knew immediately that I wanted to give it a go. Bottle fermented beer contains natural yeasts, the perfect partner to a sourdough. My favourite Aussie beer - Coopers Pale Ale - was the obvious choice.

I didn't really concentrate on hydration percentages (you typically aim for 60 - 70% of water to flour) and just cracked on with the recipe which uses the sponge method. The dough was giving off fantastic beery smells while I was kneading it.

I made the beer based sponge (barm) and left it overnight. The next day I added the remaining flour, water, salt and gave it a knead in the machine for 5mins.

I turned the dough out onto the bench to shape it and realised that I had a huge gloopy mess on my hands. Stay calm and give it a knead. At Breasserie Bread I saw how a wet dough could be brought under control if you treat it well.

Five minutes of kneading and there wasn't a hope of me being able to shape the dough. I couldn't fight the urge any more so I added some more flour. Quite a lot of flour, perhaps 100g? It was still a wet dough, but I managed to fold it and get it into my bannetton.

The end result? One of my best loaves. A Phoenix from the flames.

Once baked the beery smell had totally gone and it didn't taste of beer either. The loaf is the lightest and airiest one I have baked. It has a soft and chewy texture. If I'm being picky I would have preferred a firmer crust.

I plan to try the recipe again to see if I messed up one of the quantities.

A hacked recipe, adapted from Brydie.

Barm
220ml room temperature, bottle fermented beer.
50g flour
2 tbsp starter

Dough
365g barm (my barm didn't add weigh 365g so I added additional water to bring it up to weight)
400g flour + ~100g flour added to get the dough under control
133ml water
2 tsp salt

Method
1. Whisk together the barm ingredients and leave overnight.

2. The next morning combine the barm, 400g flour and water. Leave for half an hour.

3. Add the salt and knead for 5mins in the mixer with a dough hook.

4. Turn onto the bench, add the additional 100g of flour if needed. Fold the dough and leave for an hour.

5. Shape and place in the bannetton for 3hrs for the final prove.

6. Slash and bake with steam at 180 degrees for 40mins

Tuesday, 6 December 2011

Project Sourdough: Bourke St Bakery and River Cottage Handbook

I have purchased two books to help me on my journey baking with natural yeast. I've learnt a lot from their detailed descriptions of ingredients, methods and techniques. There is no substitute for asking advice from and sharing tips with fellow bakers. Forums and youtube videos have their place too. However books are where most of us start, so I thought I would record my thoughts on the two books I have used.

The Bourke St Bakery cookbook is about a lot more than just bread. The first half of the book is dedicated breads (sourdough, derivative and yeasted), with the rest split between pies, sausage rolls and sweet treats. My thoughts are focused solely on bready sections of the book.

The good:
The book contains a lot of detail to help out the new baker. There are detailed descriptions of each step in the process. Useful photographs to accompany the descriptions. I found these details a useful reference as I was building up my confidence.

It may only be five pages long, but the section of the book on how to create a starter and feed it in preparation for baking, is the best I've seen.

The book contained approximate timings as well as what to look out for in each step of the process. Overtime you use the timings less and 'touch and feel' more. But the timings are useful for the virgin baker.

There is a really good selection of recipes. Basic breads, different mixes of flours and suggested extras to add to your bread (e.g. the fruit bread). You could happily bake from this book for a long time without needing to go anywhere else for inspiration.

The bad:
The Bourke St Bakery book is written from a professional standpoint that makes very little accommodation for the domestic baker. I worked out several of their timing schedules and they had you up at 4am baking. That might be how a professional bakery operates, but the domestic cook wants something a bit more sociable!

I found the book quite intimidating at times. You feel that you must prove your bread at 25-27 degress with 80% humidity otherwise it is going to fail. I've learnt that you can be quite a lot more relaxed with the whole process and still produce great results.


I read the River Cottage Handbook second and this inevitably impacts my thoughts. I wasn't such a nervous baker when I read this book and was looking for different things as a result. Unlike Bourke St Bakery which focuses more on sourdough, natural yeast makes up a relatively small portion of the River Cottage Handbook. However, there are still lots of tips to be taken from the book.

The good:
The River Cottage Handbook it is a homestyle book. It is written with an infectious enthusiasm for bread, there is none of the intimidation of the Bourke St Bakery book. It makes you want to roll up your sleeves and get stuck in.

Different hints and tips come across as a result. I'd never heard of the sponge method before I read this book.

I liked the minimalist / green / ethical approach of the book.Why would you buy specialist equipment when you can just as easily 'make do and mend' with items you already have in your kitchen?

Like Bourke St there are also detailed sections on the techniques of bread making.

It had a whole section on how to build you own clay oven. It's a dream of mine to have a clay oven in my back garden one day.

The bad:
The sourdough section of the book is relatively small. There are only five different sourdough recipes and none of the variation of flavours and added ingredients Bourke St has.

It is difficult to judge fully as I read this book second when I already knew quite a bit about sourdough. However, I've got concerns that if this was my only book it wouldn't have answered all my questions as a newbie baker.


Worth a mention as well is Matthew Evan's The Real Food Companion. He has a great chapter on the different types of flour and their uses. There is only a few paragraphs on sourdough, however, they contain lots of useful tips for the less regular baker on storing your starter in the fridge and even freezing some.

Wednesday, 30 November 2011

Project Sourdough: Air bubbles part 2

Do you see those glorious air bubbles?

A quick follow up to my post on the elusive texture of sourdough. Speaking to Matt from Brasserie Bread and Tammi from the blogging conference I decided to give an extra long final prove a try.

I left the dough to prove for four / five hours in my banneton while I went out drinking whisky. The loaf had my best texture yet.

I had some great comments to my last post including the exotic sounding slap and fold technique which I'm yet to try.

I think some bread can be a bit ridiculous with air bubbles so large the contents of your sandwich are likely to fall through. I'd like to go for a bit more of an open texture still, but I'm nearly there.

Friday, 4 November 2011

Project Sourdough: Air bubbles, the elusive texture

My sourdough looks like this...

I really want it to look like this...

Can you see those beautiful, gloriously large air bubbles? I'm sure you're not looking at anything else!

One of the trade marks of a sourdough loaf is to have an open texture. My loaves so far have been a lot denser. They aren't bad dense / heavy, they just aren't as open as I'd like.

My tinkering has made me increasingly happy with the flavour, crust and shaping of my loaves, but the texture still eludes me. I've been trying a few different things, none of which seem to have worked so far. Fellow bakers I need your help!

Oven spring
The theory, as I understand it, is they the first ten minutes in the oven is crucial. After the crust has 'set' your bread isn't going to rise any more. Preventing the crust from drying out too quickly is the key.

As I mentioned in my new techniques post I've tried a few things to get the maximum oven spring that I can:
1. Boiling a pan of water and placing it in the bottom of the oven to create lots of steam.
2. Spraying water directly onto the skin of the dough before I pop the loaf into the oven to keep it moist. (Using my iron as I don't have a spray bottle!)
3. Turning off the fan in my oven. Fans are supposed to be very drying.
4. Baking the loaf inside a Le Crueset. The theory being that a mini oven, inside an oven traps the humidity and allows more oven spring.

The final prove
My Bourke St Bakery book builds the pressure by saying "the final prove is where most home bakers fall down". Apparently it's hard to replicate the right conditions for the final prove. I've developed my own method of heating my oven to ~40 degrees and then turning if off. Placing a pan of boiling water in the bottom of the oven and closing the door to create a warm and humid environment for the bread. Supposedly what is needed.

I've definitely baked some under proved and over proved loaves while I've been experimenting with sourdough. Nothing seems to make much difference.

Kneading
It occurred to me over the weekend that I might have been focusing on the wrong end of the process. The first step in making the bread is kneading. When you knead the dough you are forming strands of gluten. These strands of gluten are what trap air inside the dough creating those elusive air bubbles.

A way to tell if your dough has achieved the right structure is to try and form a window pane like below.

I've tried kneading by hand, in my mixer and a combination of the two. However, I've never created a decent window pane. Is this my problem?

I was becoming more convinced that under-kneading my dough was the problem, but I read this post tonight which suggests mixing less. Now I really am confused.

A conversation with a friend got me thinking of domestic bread machines. They are specifically designed for kneading and proving dough in temperature controlled conditions. It's just a shame my bread machine is on a different continent so I can't try it.

So bakers, what are your tips?

Update: I was lucky enough to meet Matt from Brasserie Bread the day I posted his blog. Matt's suggestion was that I wasn't giving my bread a long enough final prove. He suggested up to six hours and I've been nowhere near that. This was re-inforced by fellow baker Tammi Jonas who told me she regularly leaves loaves to prove all night, baking them at sunrise. Definitely something to try.


Hat tip to the Woodfired Kitchen for the perfect sourdough photo. And to the Fresh Loaf forum for the window paning photo.

Monday, 31 October 2011

Project Sourdough: The sponge method


 I mentioned in my very first sourdough post how I found the array of different methods and techniques quite confusing. I plumped for the Bourke St Bakery method and apart from a bit of tinkering round the edges I've been sticking quite faithfully to it.

However, yesterday I tried out the River Cottage sourdough method having bought the book following a tip from my baking oracle Brydie.

The River Cottage bread handbook describes a 'sponge' method for baking sourdough. You start the night before by creating a wet mixture with all of the water and half of the flour known as the sponge.

On Friday night I dutifully made my sponge and left it covered on the kitchen worktop over night. I was a little bit concerned that such a large volume of flour only called for a single ladle of starter.

For the sponge:
650ml water
500g strong white flour
A ladle full of starter


I shouldn't have worried as the next morning it had gone mad. Look at all that activity. The yeast wasn't just having a party. It was having a Glastonbury sized festival!

For the dough:
600g strong white flour
25g salt

You add the remaining flour and salt and knead the dough. I did a mix of hand kneading and putting it into my mixer. (Still a bit unsure of the mixer.)


Once the dough has been kneaded you form a round and put it in a bowl and cover it. You leave it for about an hour.


After an hour it has grown quite considerably. (Which my photos aren't conveying very well.)


Knock it back, form it into a round again and pop it back into the bowl. You repeat this process twice more so that the bread has had four proving sessions.

After the dough has risen for the fourth time you shape it. I popped the loaves into my bannetons for their final prove before baking. The dough had been so active that I didn't try my usual oven / humidity room trick and left them on the kitchen worktop to rise. (It was quite a warm Saturday which helped.)

I had very high hopes for my loaves. Would I be able to achieve the elusive light and more open texture I've been striving for?

What I liked:
- The method felt quite simple.
- I loved how I could see the yeast physically active, whether it was my crazy sponge or how much the dough was rising. (The warmer spring weather could be helping this.)
- I managed to shape and bake my first decent round loaf. It didn't go all misshapen in the oven.
- It's the first time I'd felt happy with the result of loaves coming out of the bannetons.
- I think they are attractive looking loaves.

What I didn't like:
- With the four rising periods you can't stray too far from home as you have to knock back the dough three times.
- The crust wasn't the best I've made. It could be a little thicker.
- I didn't get the open texture I was hoping for, again! (I might do a separate post on this.)

Overall this method isn't that different from the Bourke St Bakery technique, but I really liked it. I'd go as far as to say I preferred it. I think the trick will be to work the timings into a daily routine which will probably involve cutting down on the four proving periods.

Have you tried the sponge method?

Sunday, 9 October 2011

Project Sourdough: B Bread


When I read Brydie's B Bread recipe back in May I decided that I was going to have a go at this healthy looking loaf.

It was 'challenging' from start to finish, but rather than getting stressed out I went with the flow and the end result was surprisingly good.

I decided to use my new mixer for the first time to knead the dough. The mixer seemed to do a pretty good job. The motor wasn't struggling with the amount of dough and the mixer didn't 'walk' across the benchtop, which are common complaints of domestic mixers kneading bread.

This is the wettest dough I've made so far at approximately 75% water, compared with the 60% for the loaves I have been making. The dough was significantly stickier to handle as a result and it got quite messy as I was knocking back and folding it.

I've been following the Bourke St Bakery method since I've started baking which calls for shaping the loaves before they start their long overnight retardation. I've noticed that in quite a few of Brydie's recipes she shapes the loaves only before the final prove later in the process. I wasn't sure if the wet and heavy dough would hold it's shape, so I left the forming of the loaves until the following day.

The final prove before baking is supposedly a tricky thing to get right. I've developed a method creating a humid environment in my oven around 40 degrees and it has been working a treat. My loaves are consistently and reliably increasing in size. Unfortunately I was using the oven to roast some vegetables and bake a cake so I couldn't try my usual trick. The loaves didn't rise nearly as much as usual on the bench.

Just as I was going to put the loaves in the oven, it turned off and wouldn't heat up. Disaster! I improvised with turning the grill on and placing a baking try across the top of the oven to try and deflect the direct heat.

The finished loaves were definitely a bit under-done, but considering the disaster it could have been they turned out quite well. I took one loaf into the office to be sampled and everyone gave it positive feedback. My sister and Andrew said good things too. I couldn't help being overly self critical.

Things to try next time:
- Baking when my oven is working! This should help with my final prove and stopping the dough from being a bit undercooked.
- Using my pizza stone to bake the loaf on.
- I didn't like how sticky the dough was. I'm tempted to omit the bran and lower the hydration from the recipe.

Monday, 26 September 2011

Unearthing Artisan Baking at Brasserie Bread


A big thanks to Sarah from Brasserie Bread for inviting me to attend their Unearthing Artisan Bakery class. Under the direction of our instructor for the night Matt Brock we did so much it is hard to know where to begin!

Caramelised Garlic Bread
During the evening we made Brasserie Bread's caramelised garlic bread from scratch. It was fantastic to get some hands on tips from an expert like Matt on different kneading techniques. I've been doing quite a bit of research for my sourdough project by reading different books, but the only real way to learn is by experience. Simon made an excellent video of the evening which will be a great guide to refer back to. It's all in the wrist.


I went a bit crazy with the amount of garlic I added to my dough. I'm certainly in no danger of being attacked by a vampire anytime soon!


We got to take home the warm rolls we had baked.

Factory Tour
While our dough was proving we were taken for a mini factory tour. It was around 8pm by the time we got into the factory and all the baking shifts had finished for the day. I would have loved to have seen the factory in full flow, but it was still good to check out a professional artisan bakery.


Everything begins with the sourdough starter. There was a dedicated cool room for the huge buckets of starter. I can't remember exactly, but I think they have ~200kg of their 18yr old starter. It makes the 100g I have in my own fridge look quite pathetic!!

The first stage in the process is the large room where all of the dough is made, given it's initial prove and shaped into the loaves. At the opposite end of the work area from the starter, are a series of large temperature controlled rooms where the shaped loaves are placed for their long slow overnight prove.


The second stage is the oven room where all the loaves are baked. The temperature controlled proving rooms can be accessed directly from baking room allowing for the seamless flow of the dough through the bakery. There were pizza style ovens and also full height ovens where racks of smaller loaves can be baked on trolleys wheeled in and out of the ovens.

Once baked the bread proceeds onto the final stage of the process, the packing room. Here all of the bread is sorted and divided up into individual orders ready for collection.

I have to be honest and say that the place looked like organised chaos! There were huge whiteboards in each room with indecipherable scrawl all over them. I think part of the induction into the bakery must be how to understand the code!


We also popped into the pastry room where we got to sample some of the goodies that were being packaged up to be sent out for orders. Sorry if your box arrived missing a couple of the fabulous coconut cakes above. I couldn't resist.....

Brioche Coulibiac


In between the baking and factory tour we somehow managed to fit in making our own dinner. We first made a little parcel from a pancake, sauteed mushrooms, Russian mustard, boiled eggs and salmon fillets. Once we'd made our parcels we wrapped them in some brioche dough and baked them in the oven.


The brioche makes the dish quite rich. The usual portion size is usually only half a coulibiac, but I might have eaten all of it......


Overall a very good evening. It was nice to get some hands on baking tips and to see inside a professional bakery. I didn't pick up as many sourdough tips as I was hoping for, but then it wasn't really a sourdough course. (Brasserie Bread have a dedicated sourdough course.)

My photos of the evening are here.