Showing posts with label Cooking. Show all posts

Wednesday, 29 January 2014

Cooking: A couple of Christmas cakes

Bourke St Bakery Christmas Cake
Back in September I mentioned that I'd taken responsibility for the family Christmas Cake for the first time and had started my fruit soak using the Bourke St Bakery method.

Making the cake itself was relatively easy. You soak the fruit for five / six weeks giving it a stir every once in a while. I got into the habit of mixing mine up on Monday morning and then used the same spoon for my cereal. Alcoholic? Who me?

When it came to baking the cake I was surprised how little flour you add. The cake is practically just fruit with just a bit of a binding agent. The recipe called for the finished cake to have a weekly feed of brandy in the run up to Christmas. I only bothered twice.

The finished cake was pretty great. Rich, fruity, moist and a mild smell of Christmas. Dad thought it had a bit too much brandy, although I'd disagree and I'm normally sensitive to booze in a cake. If I make the cake next year I'd be tempted to add some flaked almonds to add a different texture.

Date, coffee and chocolate cake
 My cousin was given 10kg (yes, ten) of Saudi Arabian dates for Christmas by a grateful student. I didn't realise that Saudi Arabia is a bit producer of dates, but apparently they are.

Some of the dates found their way to me and I decided to bake a cake with half of them last weekend.

I did a bit of searching online and couldn't find a recipe that inspired me until I landed on this one. I went with it because I had all of the ingredients in my cupboard rather than anything else.

I'm not usually a fan of coffee cakes (this recipe had a cup of coffee in it), but I think the end result worked really well. It might be a bit of an opinion divider though as Becks wasn't the greatest fan. Her little cousin had three slices and her uncle two though, so there are others on my side....

Thursday, 12 December 2013

Uni Christmas Lunch 2013


Last weekend saw our annual Uni Christmas lunch. After hosting last year it was my turn to kick back and relax. There was no cobbling together a table from MDF and packing boxes, or running round my neighbours to borrow chairs.

We had a lovely day down in Lewes at Jo and Matthew's new house, a gorgeous Victorian property they only moved into a couple of months ago. You know you are in the countryside when Christmas trees are sold with names. When we arrived Matthew was in the front garden cutting the lower branches off 'Tina' so that she would fit into the stand.

Times are changing, and there were three children at the lunch this year. We had tinsel trains, pet chickens and tree decorating were new features to our Christmas lunch.


Even though I wasn't hosting I couldn't resist getting involved in the cooking and offered to bring along desserts. Inspired by the café tres gourmand we had in Paris, Becks and I decided to make a small tasting plate.

A Sunday flick through the cookbooks we decided to make Annabel Langbein's chocolate and cranberry slice, Donna Hay's maple brulée tart and some fresh pineapple to cut through it all.

The maple tart required me to get some more lighter fluid from my blowtorch so that I could caramelise the top of the tart. I had no idea what to buy and had to purchase two canisters before I got one with the right attachment to fill up my torch.

The desserts all went down really well. Some people preferred the tart and others the chocolate. Two and a half year old Toby stole his mum's forkful of the chocolate start and stuffed it straight in his mouth. His face was a picture when he realised how dense and sticky the chocolate he'd just popped into his mouth was. After a few minutes of quiet concentration he'd scoffed the lot and looked quite pleased with himself!

Saturday, 21 September 2013

A few updates from my kitchen

Here's a quick collective a few things that I've cooked over the past few months that haven't made it onto the blog until now.

In Australia the concept of 'morning tea', where you stopped work for a bit and enjoyed a slice of cake, was well established. And what's not to like? Time off work and cake has to be a winner. We seem to be having a rush of weddings in the office at the moment so I decided to celebrate each one with a 'morning tea'. So far I've baked the banana cake and pear and raspberry cake from my Bourke St Bakery cookbook and the Lemon and Demerara cake from Nigel Slaters Kitchen diaries. Every one has been a winner and I'm looking for inspiration for the fourth and final bake. It might be time for a chocolate cake?

Homemade sourdough pizza

I was re-united with my pizza stone a few months ago, which could only mean one thing, pizza! I made a sourdough bases using Clint's recipe and made a simple courgette topping on one and mushroom and chorizo on the other. You can never get that perfect base at home, but firing up the new oven to maximum they were pretty good. I was particularly impressed by the sour flavour of the pizza base. Having made the dough the day before and letting in develop in the fridge almost certainly helped.

Dengpo pork belly

I picked up some pork belly at the local Brockley Market one Saturday morning and then came home to flick through my cook books and look for inspiration. I ended up going with an adaptation of the Dengpo pork belly recipe from my Poh's Kitchen cookbook. It was salty, sweet and tender. How could you not like it? The recipe called for a braise which mean there wasn't any crackling, but with that minor quibble it was a great use of the pork. I still have the other half of the pork belly in the freezer that I need to cook.

Protein balls


During the mammoth cook up a couple of weeks ago, Becks kindly whizzed together some protein balls for me using this Jill Duplex recipe. All of the running I am currently doing means that my appetite is almost limitless at the moment and some healthy protein filled snacks are really handy. I've looked at Bounce balls before, but they are really expensive. This recipe was reasonably cost effective and kept in the freezer make a great treat when I get in from work.

Tuesday, 3 September 2013

Cooking: My first attempts at preserving

Tomato chutney
I don't know where the spark of the idea came from, but back in spring I got it into my mind that I wanted to do some preserving this year. I was initially thinking of fruit. Peaches to be precise. Eating ripe white peaches are one of the things I miss about living in Sydney.

The idea then quietly slipped away....

A few weeks ago the shop just down the road was selling 5kg boxes of tomatoes at £2.99. I couldn't help myself and bought a box. I hadn't really thought the idea through as I didn't have any containers in which to preserve into.

I liked the idea of chutney, but decided that a tomato sauce was the way to go. I turned to the Real Food Companion by Matthew Evans (thanks Penne and Clint!) and made his simple, but tasty roast tomato sauce with 3kg of the tomatoes. Scrabbling in my cupboards for some jars, with the rest of the sauce going in the freezer.

With the remaining 2kgs I made some semi-dried tomatoes by roasting them in the oven on a low temperature.

Roast tomato sauce

When I was at home last weekend mum set me up with some empty jars and tops. The project almost ended in disaster when the local shop had stopped selling boxes of tomatoes, but I found a different shop next to Everest Curry King that was selling tomatoes at the even cheaper price of £1.99.

I decided to go with the easy looking recipe on Brydie's blog, with 3kg of the tomatoes. I put in less garlic (as I had less in the cupboard) and used a smaller quantity of vinegar (substituting for red wine vinegar), but otherwise followed the recipe as it was.

The chutney is my first attempt at preserving in jars. Hopefully I have got a good seal and the chutney doesn't go off! If Becks hadn't told me I needed to moisten the plastic seals it definitely would have gone wrong.

Fruit soak for my Christmas cake

The final thing I got going (by saying "I", I really mean Becks) this weekend was the fruit soak for my first attempt at the Bourke St Bakery Christmas Cake. I've never made the family Christmas cake before. It's a big responsibility!

Friday, 2 August 2013

Project Sourdough: A pheonix from the flames


I decided to bake some more bread on the weekend as my stocks in the freezer were running low. My preferred method for baking sourdough these days is the sponge method, where you dispense with the overnight ferment in the fridge. It just seems to suit my routine better.

However, with a lazy weekend ahead of me and having recently read Brydie's post on her everyday sourdough, I decided to return to the overnight ferment.

I was a bit sloppy in measuring when I feed my start during the week and my hand slipped when adding water to my dough, meaning that a 66% hydration loaf, was probably above 70%.

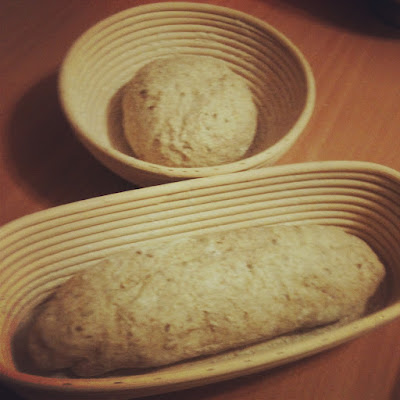
I had a very wet dough on my hands and I could barely shape it. I ended up making a rough boule and battard, flinging the dough into my bannetons and then popping them into the fridge for 18hrs.


When I got my dough out of the fridge the next morning my dough had more than doubled in size and was very over proved. I'm definitely not an expert baker, but I thought in the fridge the yeast was supposed to sleep and only the sour taste was supposed to develop. Either my fridge is too warm or my starter is some kind of super active monster.

The wet dough had stuck hideously to my bannetons, but I managed to coax it out and onto some greaseproof paper. Without the support of the banneton the over proved dough flattened to the thickness of a couple of pound coins.

It was going to be a disaster I thought, but I had no option but to chuck them into the oven. I gave them a good long 50 minute bake, ten minutes longer than I usually would for a loaf of this size.


What came out was nothing short of miraculous. A fabulously crunchy crumb that goes all over your bread board when you cut it. The texture of the bread is wonderfully holey and best of all it tastes French. Like the wonderful bread you get from the village boulangerie when you are on holiday. I've never had that before and it's magical.

I've no idea if the 'French' taste comes from using a small amount of wholemeal in the mix, from the cheap Sainsbury's flour I'm using for the first time or the overnight in the fridge, but I want more of it.

The only problem is, I know I won't be able to recreate these loaves no matter how hard I try.

Ingredients:
550g white flour
200g wholemeal flour
510g water
400g starter
15g salt

Once mixed divide into two loaves and bake for 50mins. Full the full method see Brydie's blog.

Friday, 3 May 2013

Cooking: Comté soufflé

Comté soufflé, it rose and then deflated again
before I could take a photo

I was given some comté cheese last year and it has been sitting in my fridge ever since waiting for a special event or recipe to use with it. Indecision had left it sitting the fridge for far too long, so a couple of weeks ago I decided to make the comté soufflé from Raymond Blanc's Kitchen Secrets cookbook.

At first look Raymond's book seems incredibly complicated with lots of steps and detail. However, having cooked a couple of recipes now, the instructions are easy to follow and have both produced excellent results.

We were so obsessed with cooking soufflé that we hadn't noticed the recipe served six. It only dawned on us that we had far to much soufflé on our hands as we gently slid them into the oven. A few quick phone calls produced another hungry mouth to help us demolish the soufflé.

The soufflé was deliciously light and it was easy to miss the fact that it consisted largely of full fat milk, cheese and butter. We certainly didn't miss the cheese sauce that we decided to skip serving on the side.

I can't remember the last time I ate comté cheese, but its strong, slightly nutty flavour worked well. We served a salad on the side, but something more able to cut through the richness would have worked even better.

The recipe can be found on Raymond Blanc's website here.

Sunday, 3 March 2013

Project Sourdough: wholemeal seeded loaf


The next bake after you've just made a great loaf is always a difficult one. Will it be as good? Am I destined for disappointment? With my bread supplies in the freezer running out it was time to get my starter out of the fridge and give the next loaf a go.

I decided to use some of the flour I'd found in Dulwich and bake a 55% white and 45% seeded wholemeal loaf. It would also be the first bake in my new oven.

The sponge method is now my default way to bake, with an active starter and a previous success I was feeling confident. I didn't have as much time as usual so I cut out a couple of folds and gave the loaves a sleep in the fridge overnight (common in many recipes, but not the sponge method I follow) so that I could bake the loaves the next day.


On the Sunday morning I got my loaves out of the fridge and head out for a long run while they had their final prove. Despite the bread having four hours to rise they seemed to have barely grown. Being so cold in my kitchen I don't think the core temperature had risen sufficiently for the loaves to prove properly.

As I needed to head out for the afternoon I couldn't give the dough any longer so had to whack them in the oven. I watched eagerly through the glass as the bread met my new oven for the first time. The bread didn't seem to rise much in the first 10-15mins and I was fearing I'd have very dense cakes on my hands. However, they continued to rise during the bake. It was almost like delayed oven spring. Most odd.

I was really pleased with the final taste of the bread. The wholemeal flour and seeds have given the crust a great taste. I also think the overnight the loaves spent in the fridge helped the sour to develop.

Two good loaves in a row. Can I make it a third?

Monday, 4 February 2013

Baking sourdough in the oven that wasn't


I decided that I'd treat myself to an oven as a little January present to myself. With a million different ovens on the market research is more complicated than you'd think. There are just so many opinions and options out there. I decided to go with the Which? best buy oven as it was a sensible price and I knew I wouldn't be going too far wrong.

On Tuesday night I got home later after dinner with a friend and a glass of red wine to the good, logged onto the John Lewis website, clicked purchase and selected Saturday as a delivery option. Job done I headed to bed.

I decided that I wanted to bake a loaf as sourdough to christen the new oven. On Friday night I mixed my sponge following the River Cottage method.

The new oven doesn't come with a plug or electrical cable (no idea why) so on Saturday morning I pulled out the old oven and took off the back so I could remove the cabling and swap it onto the new oven when it arrived. And then I waited...


.....and waited. After lots of muttering about John Lewis' delivery service I decided to give them a call. Checking the order confirmation I realised I'd selected next Saturday. Never drink wine and order an oven on the same nigt. What an idiot......

The old oven was re-wired and connected back up. And then I baked!

I've only been baking semi-sourdough since getting back to the UK and this was my first loaf of full sourdough and it turned out really well. There was lots of oven spring and the bread has a great texture. I'd prefer a slightly thicker crust, but hopefully the new oven will help with that.

Sunday, 20 January 2013

Project (semi) Sourdough: First loaf of 2013


I decided that I wanted to bake my first loaf of 2013 this weekend. With the cold snap that is currently going on in the UK I wasn't sure how a pure sourdough loaf would stand up and I didn't want to be tied to the kitchen if proving times were taking longer than expected, so decided on a semi-sourdough loaf instead.

I also had in the mind to try and re-create the excellent pain de campagne that I bought from Dégustation in Brockley a few weeks ago. Searching for "semi-sourdough pain de campagne" didn't yield many results, but I did find this recipe on the Wild Yeast site. It looked like just what I wanted so I decided to give it a go.


The results turned out pretty well. I tasted the bread alongside a slice of the pain de campagne I had in the freezer. My loaf isn't as good, but not far off which is pleasing.

My bread had some reasonable oven spring and a nice structure to the bread. I would have preferred a thicker crust (I think I could bake it for a bit longer next time) and there is still a faint taste of the dried yeast in the bread. Must try a full sourdough next time.

Over the past week I've been thinking of buying a new oven and baking this loaf has firmed my resolve to get one. The oven took an hour to get up to temperature, I really don't trust the temperature and had to bake the loaf for twenty minutes longer than prescribed and when I through some water on the base of the oven it dripped back out rather than turning to steam. Clearly something not right with the temperature.

The only question is could I install a new oven without electrocuting myself or blowing up the oven?

Sunday, 6 January 2013

Cooking: Turkey Pie and 'Perky Turkey'


 Turkey is the king of meats on Christmas day, but if I'm honest, I have never been a fan of eating the leftovers. The breast meat can often be quite dry and the dark meat has a gamey flavour that always surprises me at how strong it is. This year I thought I'd try a coupe of different recipes from the usual sliced turkey or turkey curry.

Turkey Pie
The first recipe I made was a Turkey pie, loosely inspired by this recipe, but heavily adapted to what I had in the fridge. It was a great tasting pie that was simple to make and my favourite of the two turkey dishes I made.

Serves 4/5

Ingredients:
Four rashers of bacon
Large onion, diced
Mushrooms, sliced
Glass of white wine
Two/three of handfuls of cooked turkey, diced
Pinch of cayenne pepper
Pinch of mixed dried herbs

For the pastry:
200g flour
100g butter
2 tbsp of cold water
1 egg (for the glaze)

Method:
Chop the bacon and fry it in a pan. When it is cooked remove it from the pan and add the diced onions. After five minutes add the mushrooms and when they have fried for a couple of minutes and the white wine, mixed herbs and cayenne pepper. Let everything simmer and the wine reduce slightly. Add the bacon and turkey to the pan for the final couple of minutes. You don't want to overcook the turkey.

To make the pastry rub the butter into the flour and then add the cold water to bring everything together. Wrap the pastry in the fridge and leave it to rest for half an hour.

When you are ready to cook the pie, heat the oven to 180 degrees. Place the pie filling into a dish and then cover with the rolled out pastry. Brush the top of the pastry with beaten egg and pop in the oven for 25 minutes. Using the leftover pastry to make your initial is option.


Perky Turkey
The 'perky turkey' is a Nigel Slater recipe that I followed a bit more faithfully then the pie which I free styled. A marinade / sauce for the turkey is made from garlic, soy sauce, honey, mustard and ketchup and then it is baked in the oven to reheat. Although I followed the recipe you could make a sauce at of any of your favourite ingredients and follow the same idea.

I liked the concept of the 'perky turkey' but I think the marinade / sauce could have done with some more robust flavours to take into account the greater quantity of dark meat I was using. I will also add some more liquid next time to create more of a gravy / sauce.

I served the 'perky turkey' with some sautéed leeks and steamed rice.

You can check out the recipe on the BBC website.

Monday, 17 December 2012

Cooking: Uni Christmas Lunch

Butternut squash soup with pumpkin crisps 

While I was in Oz a group of friends started meeting for a pre-Christmas lunch. As I hadn't taken a turn in cooking before I volunteered to host this year's lunch. The thought of cooking for twelve people didn't phase me too much, but I got quite concerned about where they were all going to sit!

The excellent dinner I had at Mike and Ollie's  a couple of month's ago made me realise that you could have a great evening crowded round make shift benches so when my friend Will came to stay a few weeks ago we popped to Wickes to buy a big sheet of MDF for a make shift trestle.

Table sorted my next worry was chairs. I decided to put up a sign in the entrance hall of my flat offering a cake for chairs trade with my neighbours. Within four hours of the sign going up I had three offers to lend me chairs. I like to think there is a wonderful community spirit in my block and it was nothing to do with the temptation of cake!

Saucisson from Brockley Market 

The problem of where everyone was going to sit sorted it was time to think about the food. Again my dinner at Mike and Ollie proved the inspiration and I decided that I wanted to try and re-create the awesome poached plum that we had during the dinner. Soup is an easy banker for a starter and who doesn't like a chocolate tart for dessert?

Menu decided I upon I got ordering the food. I've started using the East London Steak Co for ordering meat. A few clicks and I'd got the pork belly on order for Thursday morning. The only problem was that I forgot and went out for a run. When I got back I had four missed calls on my phone and the delivery driver had been and gone. Thankfully the delivery driver was excellent and happily agreed to come back the next morning. That's customer service for you.

Roast nuts 

I can be a bit of a recipe slave sometimes, but surprised myself with how flexible I was with the uni lunch. I read a few recipes to get ideas and then flexed them to suit the ingredients I had in my cupboard or what suited my tastes. I think it worked pretty well!

To get everything started I bought some bubbly from Aldi (don't tell my friends), saucisson from Brockley Market and made some roasted nuts loosely based on a Nigella Lawson recipe. They could have done with a bit more of a chilli kick for my liking, but they were still flavoursome and moorish.

You don't really need a recipe for soup. I decided to go with pumpkin as it's seasonal and I like it! A couple of days before the lunch I watched Nigel Slater's Dish of the Day and saw him make some pumpkin crisps using the peeling of the butternut squash and decided to give them a go. They were a great use of something that you'd otherwise throw away, but I found they took quite a long time to dry out in the oven.

Roast pork belly, gratin duaphinois and poached plum 

For the main event I decided to try and re-create Mike's poached plum. The pork belly was almost an accompaniment and decided to add a gratin duaphinois to fill everyone up!

I poached the pears in some red wine, cinnamon and star anise. Reading  couple of recipes online I decided to poach the plums for twenty minutes which was way too long and they lost all of their texture. Luckily I'd bought a second punnet of plums and poached the next batch for ten minutes which was more or less right. I decided to blitz the over cooked plums into the red wine to make a sauce which worked pretty well.

The pork wasn't quite the splendid version that Mike cooked. It was my first time cooking pork belly and I don't think that I cooked it long enough for that melt in the mouth tenderness and my crackling didn't really crisp up as hoped. I ended up cutting off the skin and giving it a blast under the skin. It was still good just not what I was hoping for.
 
Pear and chocolate tart
 
 For dessert I decided to use Jamie Oliver's pear and chocolate tart recipe. I think the tart ended up being my favourite part of the meal (although the plum was pretty stellar as well). Served slightly warm (if you heat it up too much it goes runny) it went down very well with a bit of ice cream.
 
One of my neighbours got a banana bread for her chairs and the other got some of the pear and chocolate tart. A pretty fair trade I'd say.
 
I've got a load of the leftover pork belly in my freezer. Have any of my cookery minded friends got a suggestion of what to do with it? So far I'm thinking of some stir fries. The pork belly also came with the baby back ribs that I used as trivet during the cooking process. I'm thinking of double cooking and trying some kind of pulled recipe.....

Sunday, 14 October 2012

Project Sourdough: UK edition


Having been back in the UK for four months I was getting the urge to bake again.

I had a few problems getting a starter going in Sydney and was hoping to avoid the same angst second time around. As most bakers are regularly binning some of their starter as it grows and divides I made an appeal on the local forum for anyone who had some to give away. Sadly no one came forward so I set about creating my own.

I bought some rye flour (which is supposed to be easier) and loosely followed Byrdie's ridiculously easy post on how to create a starter. After three days it had taken off! (Top photo)

With my starter less than a week old I was invited to Sunday lunch at a friend's house and decided to take a long a loaf of bread.

I followed my favourite sponge method. A starter is generally a bit weak to bake with after just four days and my sponge wasn't looking as vibrant as it usually does so I decided to add some dried yeast, making what the Bourke St Bakery calls a semi-sourdough.

My oven here in London isn't the best. It has a very top down heat which has a tendency to burn things so I decided to go for the Le Crueset method of baking.

My first loaf in the UK was pretty good. The oven spring was great (which I think baking inside the pan helps with), it had a great shape and importantly my friends all seemed to love the bread.

The sour flavour wasn't as developed as I would have liked, but that's to be expected while my starter is still young. Baking the bread inside the Le Crueset meant that the crust brown as much as I would have liked. I find that the majority of flavour in a sourdough is in the crust so I don't think the Le Crueset  will be my favoured method once I have a better oven.


For my second loaf this weekend I was rushed for time and had half a packet of dried yeast left to use so decided to go for another semi-sourdough. The Bourke St Bakery book suggests not slashing the top of a semi-sourdough loaf prior to baking. As you can see the crust half erupted so I'll be ignoring that advice next time round!

It's good to be baking again.

Tuesday, 25 September 2012

Liz and Richard's Café: Wedding Catering

Little brother (aka me) was nominated to organise refreshments for all the guests before the church service at my sister's wedding. I was feeling excited, honoured and a little bit nervous at being given such a responsibility.

Around the time Ruth asked me to organise some food I read this post about Trina's wedding. The most awesome looking wedding food I have ever seen was inspiring and intimidating in equal measure. Knowing that I wouldn't be able to achieve anything so impressive I decided to go a bit more home style.

Bacon sandwich tasting

Andrew requested bacon sandwiches which made them a must for a day. My first concern was how I'd cook and serve a huge batch of bacon rolls within thirty minutes. After some searching on the internet I stumbled upon the method of baking bacon. Laying the bacon direct on the bars of the oven shelf and cooking the rashers in a single layer for 10 - 20mins renders the fat and results in an incredibly even finish. First problem solved.

My second worry was the bread roll. My first thought was a white and fluffy roll as that seems to be the classic. In the name of research I sampled the bacon roll from Farm in Smithfield.  A mighty fine bacon sandwich which is served in a sourdough roll and had me rethinking my strategy. The choice of bread roll was getting me all confused, so set up a tasting session and made Andrew, the groom, decide. He opted for the Greggs corn topped roll.

The bacon was a lot more straight forward as I know I'd be betting it from my parent's local butcher Calnan Brothers. Remembering the awesome sumac bacon I had at Revolver, I experimented with trying to flavour bacon with some sumac I bought in Turkey. However, I foud that it didn't make a lot of difference to the final flavour. Perhaps I wasn't using enough sumac? In the end I plumped for unsmoked back bacon.

Pulled pork rolls

One of the ideas I did get from Trina's wedding post was for a pulled pork roll. The recipe was something I did a bit of head scratching over as I know that anything too spicy wouldn't go down well down with the crowd.

I then saw this Heston pulled pork recipe and knew that it was the one for me. Really easy to make the sauce has a fantastic sweet and sour tang. I cut back on the amount of sugar used as I found the initial trials a bit too sweet. I also found pork leg a better, and cheaper, cut than pork shoulder to use. It seemed to 'pull'  a lot more easily. Served with some shredded lettuce in a malted brown bap I was pleased with the result.

Local apples

Completing the spread we bought some local apples. Mum got baking and made banana bread, bara brith (a Welsh tea bread) and her special flapjacks. I also knocked up some roasted vegetable sandwiches for the veggies that came along.

In the end I was really pleased with how it went. My friend Will and I made sixty bacon sandwiches and around the same number of pulled pork rolls inside thirty minutes. The bacon rolls were a sell out, and nearly everything else went with the exception of the apples. The healthy option wasn't a big seller at all!

Being in the kitchen we didn't get to see people eat the food, but the feedback we got was all good. We kept all the guests bellies full before the main reception later in the day and most importantly I don't think we poisoned anyone!!

Pulled pork, heavily inspired by this recipe.

Ingredients
½ tsp ground ginger
½ tsp sweet smoked paprika
½ tsp mustard powder
½ tsp salt
1 tbsp vegetable / sunflower oil
1 small onion, peeled and finely sliced
1 clove garlic, peeled and roughly chopped
500ml chicken stock
325g passata
250g tomato ketchup
175ml cider vinegar
80g dark muscovado sugar
10ml Worcestershire sauce
1 tsp tamarind paste
2kg pork leg

Method
Mix together the ginger, paprika, mustard powder and salt and stir well to combine. Set aside.

Add the oil and sliced onion to a large pan and cook slowly until the onion starts to brown.

While the onion is cooking cut your pork into large pieces and cover with half of the spice rub and massage it into the meat.

Returning to the onions. Once they are golden add the garlic and continue to fry for one minute. Then add the remaining half of the spice rub and all the other ingredients (excluding the pork). Bring to the boil and simmer for 15mins.

While your sauce is simmering brown the pork in batches in a large fry pan. I had a couple of pans on the go at the same time.

Add your pork to the sauce, cover and simmer for an hour and a half. Once the cooking time is up let the pork cool completely in the sauce.

Once the pork is cool remove it from the sauce an pull it by hand.

Tuesday, 14 August 2012

Discoveries of the weekend

Fresh blackberries

I love fresh berries, but have an aversion to paying exorbitant prices for them. When I saw a tweet from Sue that there were fresh blackberries ready for picking in the local cemetery I made a beeline straight there.

I hadn't been into the cemetery before. Many of the graves were overgrown with weeds, but importantly brambles too. Quite a few people had obviously had the same idea, so lots of the easy pickings were gone and I have quite a few scratches from wading through the bushes to get at unpicked berries.

Being a grave yard, it was also a moral dilemma. Is it ok to stand on an overgrown grave to pick blackberries? Balance on someones headstone?

After forty five minutes I'd managed to fill two ice cream containers. There were lots of unripe berries too, so I'm sure they'll be a good supply over the next couple of weekends as well.

Ice cream sandwich

This weekend I also did some experimentation for my sister's wedding using the pork I bought at Jimmy's farm (more on that later). Deciding I needed a dessert for my recipe testers I had the urge to make a mini ice cream sandwich.

I made super gooey chocolate cookies and sandwiched some raspberry ripple ice cream between them. Tonight's take was enhanced by some of my hard won berries.

Chocolate cookies adapted from this Mary Berry recipe.

Ingredients:
200g dark chocolate
50g butter
1 x 405g tin of light condensed milk
225g self raising flour
A handful of dried fruit / mixed peel

Method:
Melt the butter and chocolate in a bowl over boiling water.

Once the butter and chocolate are melted, remove from the heat and stir in the condensed milk.

Place the flour and dried fruit / mixed peel in a (larger) separate  bowl and then add the chocolate mixture. Give everything a good stir to combine.

Place large heaped teaspoons of the mixture on a lined baking tray and bake in the oven for 15mins at 180 degrees. After 15mins they won't look cooked, but remove them from the oven as they will firm up and you want them to remain gooey.


The volume of mixture should make approximately 50 small to medium cookies like mine. I only baked 20 cookies and put the rest of the dough into my freezer. Not something I've done before so hopefully it will be ok when I next want to bake!

The original recipe called for white chocolate chips instead of dried fruit. I decided that with the ice cream there was going to be a lot of sweetness already so would try some dried fruit instead (although fruit isn't exactly savoury). I bought a cheap bag of mixed sultanas, raisins and 'other' mixed fruit. There seems to be some dried orange peel in the mix which I'm loving.

Saturday, 14 July 2012

Cookery course: Cooking Alaturka, Istanbul

Imam bayildi: aubergine braised in olive oil

With my travel partner at a conference dinner I made the most of my evening free and signed up for the cookery course at Cooking Alaturka.

I was expecting a cookery course at the restaurant, creating and eating my own dinner. I wasn't expecting to be cooking the dinner service for a whole restaurant!

Cooking Alaturka's model is to use the students to create a set menu to be served to all the customers. A fact that only dawned on me when I was making my umpteenth stuffed vine leaf and I thought to ask how many were in a serving!

Ezogelin corbasi: red lentil and bulgar soup

Chef Feyzi was a real character. A stickler for precision and a hater of waste (I got in trouble for throwing the end of an onion in the bin) he had a cheeky sense of humour. Several times he got us going on totally pointless tasks just to see how long it would take for the penny to drop and we'd realise he was pulling our legs.

Kabak mucveri: courgette fritters

Lentil soup, aubergines (cooked in a variety of ways) and stuffed vine leaves are dishes common on lots of Istanbul menus, so it was good to learn how the Turks cook them.

I'd never made wrapped vine leaves before. It was a bit fiddly (or is that monotonous?) to prepare all of the vine, but easier than I thought to wrap them. I hadn't realised that you boil vine leaves as the ones I've eaten in the past have never felt particularly soggy.

The course also gave me the confidence to be able to buy some Turkish spices and to know what to do with them back home.

Etli yaprak dolmasi: vine leaves stuffed with mince meat

I think the course could have been a little more structured as we jumped around a lot and I wouldn't say that I saw any of the dishes from start to finish. That's ok if you just want a fun holiday experience (which I suspect is the majority of the clientele). However, if you are slightly more recipe minded like it would have been good to see the recipes end to end.

They also gave us a list of restaurant recommendations for Istanbul which was great. Receiving it at the time you make the booking would have been even better so you could plan restaurants to try a bit more in advance.

Incir tathsi: walnut stuffed poached figs

Overall it was a fun evening. All of the food was tasty, relatively easy to make and used traditional Turkish recipes. Feyzi was a real character and all of the other staff were helpful too.

The braised aubergines and stuffed vine leaves were my favourites. The night I was there only a few other customers were in the restaurant in the evening eating our food. However, they were kind enough to say nice things about the food!

Making Turkish coffee


View Istanbul July 2012 in a larger map Key: Yellow sights. Green visited on the Istanbul Eats food tour. Red eaten at and reviewed (outside of the food tour). Blue places stayed.

Saturday, 28 April 2012

Cooking: White, Semolina, Rye and Sesame Sourdough


When I first started project sourdough I bought a big bag of semolina flour. I didn't really know why, but it seemed a good baker type thing to do!

I'm still not exactly what the best uses for semolina are. I've predominately used it for dusting my bannettons and homemade cardboard peel. However, I've always been tempted with the idea of actually baking a semolina loaf.

Last weekend I set out to make a white loaf and then saw a tweet from Diana about her 4S (Spelt-Semolina-Sesame-Sourdough) bread and an idea was formed.

Adapting the River Cottage Sponge method and this recipe I created a hybrid white, semolina, rye and sesame loaf.


The final loaf has a distinctly nutty sesame flavour. It takes you a little by surprise as you can't see the sesame seeds in the loaf unless you look closely. The rye flour adds an earthy flavour. There's lots of action going on in the crust. I think it would work really well as a toasted bread.

Although the main objective of the loaf was to bake with semolina flour for the first time it is completely unnoticeable in the final loaf (to me at least). The loaf didn't have a particularly open structure, but I'm not sure if the semolina made a difference to this or it was a factor of the rye flour and me horrendously over proving the bread.

Ingredients:
325ml of water
250g of white flour
Ladelful of starter
100g rye flour
200g semolina flour
12.5g salt
60g of sesame seeds

Method:
Create a sponge by mixing the water, white flour and starter and leave overnight.

Toast the sesame seeds and set to one side.

Add the rye, semolina four and salt to the sponge and knead for 10mins (I used a mixer). Add the sesame seeds in the final couple of minutes and knead through the dough.

Form into a round and place in a bowl to prove for an hour.

After an hour knock back, fold, form into a round again and then place back in the bowl. I repeated this step two / three times.

Shape the loaf and leave for a final prove. I gave my bread 5hrs (as I went out) which was a bit too long!

Heat the oven to 250 degrees. Bake with steam. After 10mins turn down the oven to 200 degrees and bake for a further 30mins. The loaf should bake for 40mins in total.


Monday, 23 April 2012

Cooking: Sourdough Pizzas Part 2

A gorgeous pizza

Having made our pizza dough, it was cooking time!

The ideal is to have a wood fired oven in your back garden, but not many of us are that lucky, so improvisation is key. Clint made it look easy, but there was lots of balancing and tweaking being done. I know that I will struggle the first few times on my own before I get the hang of it.


The first step was to shape the dough. Not a rolling pin in sight Clint was shaping the dough by hand. He made it looks deceptively easy, but my effort was an unattractive oval!


Unconventionally the pizza is placed onto the stone with out any toppings to get a head start in the cooking process. Again, Clint made the flick off the paddle onto the stone look deceptively easy, but on my only attempt I partially missed the stone and some of my dough ended up on the bars!


After the base has had a couple of minutes to start crisping up the tomato sauce and toppings are added. When you are done close the lid on the BBQ to get the heat circulating. We found that all of the toppings cooked pretty quickly.

Once it's done, whip it off the BBQ, cut and enjoy!


Method:
1. Heat your BBQ on maximum to get everything nice and hot.

2. Take a ball of dough, flour it liberally on both sides to stop it sticking to your hands and flatten it out slightly.

3. Liberally sprinkle your pizza paddle with semolina to stop the pizza sticking when you place it on the paddle.

4. Starting turning the dough on your finger tips with the dough facing up, parallel to the floor. As it stretches it will begin to fall down one side of your hands. Keep the dough moving constantly until you are happy with the size and then lay it on the paddle.

5. Slide the dough onto the pizza stone. Close the lid and let it cook for 1 - 2mins to give the base a head start in cooking.

6. Add the tomato sauce (pasatta, garlic, chilli and dried Italian herbs) and the desired toppings.

7. Close the lid of the BBQ and cooking until your toppings and the base is done.

You want to keep the temperature on the BBQ pretty high throughout, but it will need constant tweaking so the topping / base don't cook too quickly in relation to each other.

Things to try:
The best pizzas I've eaten have had a crunchy top to the crust round the edge of the pizza. Sadly ours didn't. I'm tempted to try putting the plain base onto the stone for a minute, flipping it, leaving for 1 - 2mins and then proceeding as above.

I've no idea if it will work, but could be fun to try!

Toppings:
We tried four toppings on the night:
1. Tomato sauce, chrizo (which had been chopped and fried previsously), lots of basil leaves and grated mozzarella.

2. Tomato sauce, grilled eggplant and grated mozzarella.

3. Tomato sauce, capers, anchovies, chilli and ricotta.

4. Tomato sauce, mushroom and grated mozzarella.

Saturday, 21 April 2012

Cooking: Sourdough Pizzas Part 1


Last July I gave my good friend Clint some of my sourdough starter. Easter was the first time I've seen Clint since then and it was great to spend some quality geeky sourdough time to together. 

We've picked up different tips and tricks in our baking journey. Clint has done a lot more playing with different types of flour than I have. While I was able to show Clint some of my kneading techniques. We're both hacks, but it was fun to mess around together with some flour.


My last trip to Brisbane saw the epic burger project which created a truly magnificent burger.

This time it was all about the pizza and I was happy to sit back and soak up Clint's knowledge from all the experimentation he's done. My previous attempts at homemade pizza have been pretty disappointing. A lot certainly comes down to the cooking, but without that tasty dough you're not off to a good start.

Clint started his pizza journey with this epic recipe. He sent me the link previously and I found it very intimidating.  I'm pleased he was able to distill the knowledge to me much more simply.


Ingredients:
Makes three pizzas

130g starter
370g flour
220g water
15g salt

Method:
1. Mix together the starter, water, salt and 50 - 75% of the flour.

2. Rest the dough for 25mins to autolyse.

3. Knead the dough for 7 - 10mins. Spend most of the time kneading with the remaining flour held back. Slowly add the remaining flour in the last 3 - 4 mins.

4. Turn the dough out onto the bench and give it a quick knead by hand.

5. Divide the dough into three equal size pieces and then shape into rounds.

6. Flour the dough and sit the rounds on baking paper, cover and place in the fridge. We did 24hrs in the fridge, but you can leave it for up to a week (apparently).

7. Take the dough out of the fridge 2 - 3hrs before you need to bake to bring it up to temperature.